Using Control Containers in Alteryx Designer
by Nathan Purvis
Background
Earlier this year, Alteryx unveiled some fairly special updates as part of their 2023.1 release such as the Dark Mode BETA and Auto-Documentation tool. However, one long-awaited feature was the addition of Control Containers. I remember watching the product keynote speech live at Inspire and seeing the reactions to the demo - these really are a game changer!
So what are they? Well, on the surface, they appear the same as normal Containers - a tool that we can place others inside to segment our workflow. We can also enable and disable them, as well as format their style, much like standard Containers. However, Control Containers have some fairly significant upgrades in that they now allow us to execute these sections of our workflow conditionally and sequentially, as well as print out their workflow messages as data. Gone are the days of Block Until Done tools and hacky workarounds for having true control over a workflow. In this blog, we’ll run through some examples of how you can leverage this new feature to make your life a lot easier!
Running parts of your workflow sequentially
Perhaps the best example to use for sequential running is a tale as old as time: you want to output different streams of your workflow to separate sheets within the same Excel file, but when you go to hit run, you get an error stating the file is already in use by another process. The reason for this is that Alteryx will run multiple streams at once, therefore trying to simultaneously open and write to multiple instances of the same file which isn’t possible. To overcome this, we used to have to employ workarounds like the Parallel Block Until Done macro, which would wait for completion of the first stream before initiating the second and so on. However, with Control Containers we can now handle this with native tooling. An example of the error mentioned above can be seen here:
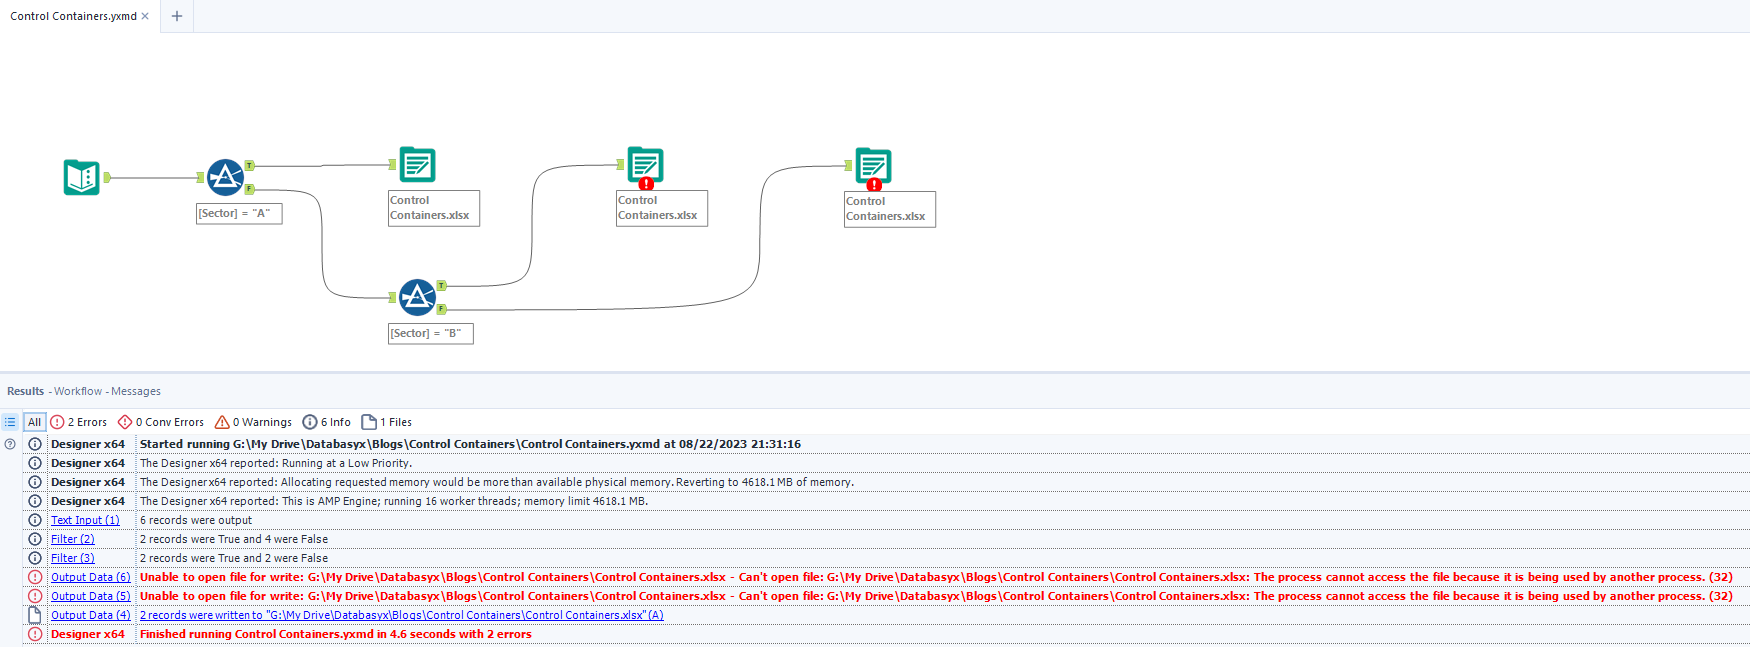
This example is incredibly simple. We have 3 sectors: A, B and C, which we want to output to a single file, with a sheet for each sector. Here a couple of Filter tools have been used to split out the data and prepare the 3 Output Data tools ready to create the Excel file.


Now, to ensure that the Output Data tools run sequentially, where one will finish writing to and close the Excel file before the next starts, we first add each of them to their own Control Container, like so:

After this, we connect the three Control Containers by dragging the green output anchors to the grey (which denotes optional in Alteryx) input anchors, as shown here:

Now when we hit run on our workflow, you’ll see in the results pane that everything runs sequentially; the Control Containers are activated, run and then finished in order, waiting for the previous one to complete before kicking off the next. We therefore get our file outputted nicely, without errors and having the tabs in our desired order:

And that’s all there is to it! The connection between these two anchors tells Alteryx that the ‘receiving’ Control Container can’t be activated and begin until the previous has completely finished processing.
Although this example is very simple, it is by far the most common requirement I see popping up for running a workflow sequentially. Hopefully this helps you to get a grasp on the concept and see how else you could apply this i.e. rolling multiple workflows that are dependent on one another into one, each within their own Control Container.
Running parts of your workflow conditionally
Have you ever wanted to limit a section of your workflow to only execute if a certain condition is met i.e. sending out an email if a row count has been breached, or there’s too many nulls in the data? Well, you guessed it, Control Containers now have you covered! To keep things short and sweet, we’ll just cover the row count breach example. This ought to cover the core concepts and again allow you to see the possibilities of how this new feature can be used.
In this scenario, we want to receive a warning email if there is more than 1 record for the ‘A’ sector. For any conditional running via Control Containers, this relies on performing a boolean test - via a Filter tool - on our condition. Whether we want the section of the workflow to execute on true or false, we attach that output anchor of the Filter tool to the Input anchor of the Control Container. If records pass through i.e. satisfy the check, this tells Alteryx to execute the contents of the Control Container. If not, the Control Container will not run. For our row count breach, we’ll start with the same data set as used above:

As we want to conduct this check based on the count of how many sector ‘A’ records are present in our data, we’ll isolate these with a Filter and use a Summarize tool to give us a count:

Now we do our check. As we want to send out an email when there is more than 1 ‘A’ sector record, we’ll just use another Filter with the condition that our count field is larger than 1. We want this to trigger our Control Container when true so we’ll therefore connect the Filter tool’s top (true) anchor to the Control Container input:

Within the Control Container itself, we’re just using a Report Text tool to dynamically bring our count into an actual sentence which we then feed into our email. From the dataset above, we have 2 ‘A’ sector records and so we run this, the Control Container triggers and we receive an email:

Whereas, if we just take one of these records away in the Text Input, our boolean check of count > 1 is now false and so no records pass out of the true anchor and trigger the Control Container, resulting in no email being sent:


Hopefully this short demonstration can help you see just how this functionality could be used - it’s a fantastic, dynamic and easier alternative to the workarounds and Detour methods that we’d currently need to use!
Printing/using workflow messages as data
We’ve all seen the blocks of text in our results pane telling us various statistics about our workflow such as how many records passed through various anchors of a Join or Filter tool, the number of records being read or written by an Input or Output Data tool, tool warnings/errors and so on. However, until now, we’d not really been able to do anything with these messages within the workflow itself. Sure, we can output log files that we can then read in and process elsewhere, but this just adds more work and time to our processes. So, you guessed it, that’s where the last big feature of Control Containers starts to shine! Here we’ll look at how we can capture and use these workflow messages as data itself.
Any message associated with a tool that is placed within a Control Container will be printed out as data afterwards. Within this short example, we’ll just make a simple PDF report that will act as a rudimentary log of what happened within the Control Container, with a row rule highlighting warnings/errors. In order to use the messages we get from Control Containers, we just need to connect tools to the green output anchor like so:

As you can see, we get the ToolID, type of message and the message itself that we can use however we wish. For this scenario, a Table tool has been used in order to apply the formatting and such. However, we could treat this like any other data set and connect whichever tools we need. One other example of how we might use this feature is to start parsing these messages and counting the occurrences of certain words.
The report we get from this short demonstration can be seen below and, again, hopefully this allows you to see how we can start to leverage this new addition to make our lives easier:

As usual, we really hope you have found this blog to be useful and we’d love to hear any feedback, criticism or suggestions for the future!